Forms
Vanilo Cloud comes with a simple yet flexible solution to define various forms for your shop. These can be contact forms, waitlists, special requests, applications, return forms, you name it.
The forms can be defined in the config/forms.json file. You can set the form's name, texts, fields, their validations,
bot protection with or without captcha.
Defining a Form
To define a form, you need to create the config/forms.json file. You can add one or more forms here.
Sample form:
{
  "waitlist": {
    "id": "r5Mr4aQ7Zsf3BW0VLnij5",
    "name": "Shop Waitlist",
    "enabled": true,
    "admin": {
      "menu_title": "Waitlist",
      "list_title": "Waitlist",
      "single_name": "Waitlist Member"
    },
    "frontend": {
      "after_submit": {
        "title": "Thanks for joining!",
        "text": "You’re on the waitlist — we’ll be in touch when we’re ready for you.",
        "button_text": "Back to the Homepage",
        "button_url": "/"
      },
      "bot_protection": {
        "captcha": true
      }
    },
    "fields": {
      "name": {
        "validation": "sometimes|nullable|string|min:2|max:100"
      },
      "email": {
        "validation": "required|email:strict,rfc,spoof,dns"
      }
    }
  }
}
Form Page
The form defined above has a direct URL at the /f/waitilst path. The contents of this form are rendered from the
resources/views/forms/waitlist.blade.php
@extends('shop::layouts.default')

@section('title', $form->name)

@section('content')
    <section class="container" id="waitlist-form">
        <h1>{{ $form->name }}</h1>

        <form action="/f/waitlist" method="POST">
            @csrf

            <div>
              <label for="name">Name</label>
              <input type="text" name="name" value="{{ old('name') }}">
              @error('name')
                  <div class="text-yellow-200 text-sm">{{ $message }}</div>
              @enderror
            </div>

            <div>
              <label for="email">E-mail</label>
              <input type="email" name="email" value="{{ old('email') }}">
              @error('email')
                  <div class="text-yellow-200 text-sm">{{ $message }}</div>
              @enderror
            </div>

            <div class="mb-5">{!! $form->botFightSnippet() !!}</div>

            <button type="submit">Join the Waitlist</button>
        </form>
    </section>

@if($errors->any())
  @push('scripts')
      <script>
          document.addEventListener('DOMContentLoaded', () => {
              document.getElementById('waitlist-form').scrollIntoView({behavior: 'smooth'});
          });
      </script>
  @endpush
@endif

@endsection
As you see the form waitlist defined in the forms.json file is injected into the view as the $form variable.
Embed Form In Another Page
To use this form on any other page, you can fetch the given form using the form('waitlist') helper.
Here's a sample HTML code:
<form class="newsletter" action="/f/waitlist" method="POST" id="waitlist-form">
    @csrf
    <div>
        <input type="email" name="email" placeholder="Enter your email">
        <div>{!! form('waitlist')->botFightSnippet() !!}</div>

        @error('email')
          @once
              <script>document.addEventListener('DOMContentLoaded', function () {
                    document.getElementById('email-validation-error').scrollIntoView({behavior: 'smooth', block: 'start'});
                });</script>
          @endonce
          <small style="color: red;" id="email-validation-error">{{ $message }}</small>
        @enderror
    </div>

    <button type="submit" class="btn btn-primary">Join Waitlist</button>
</form>
Form Protection
The form has a built-in Honeypot mechanism, and optionally you can also enable the captcha.
For more details how to setup the captcha, see Captcha Configuration
To inject the bot fight snippet into your HTML, simply use this code:
<div>{!! ($form ?? form('waitlist'))->botFightSnippet() !!}</div>
Replace
waitlistwith the name of your form defined in theforms.jsonconfig file
Form Submission
Once the form is submitted, the resources/views/forms/submitted.blade.php will be rendered.
A typical content is:
@extends('shop::layouts.default')

@section('title', $form->name)

@section('content')
    <section class="section">
        <h1>{{ $form->afterSubmitTitle }}</h1>

        <p>{{ $form->afterSubmitText }}</p>
        <div>
            <a class="btn btn-primary" href="{{ $form->afterSubmitButtonUrl }}">
                {{ $form->afterSubmitButtonText }}
            </a>
        </div>
    </section>
@endsection
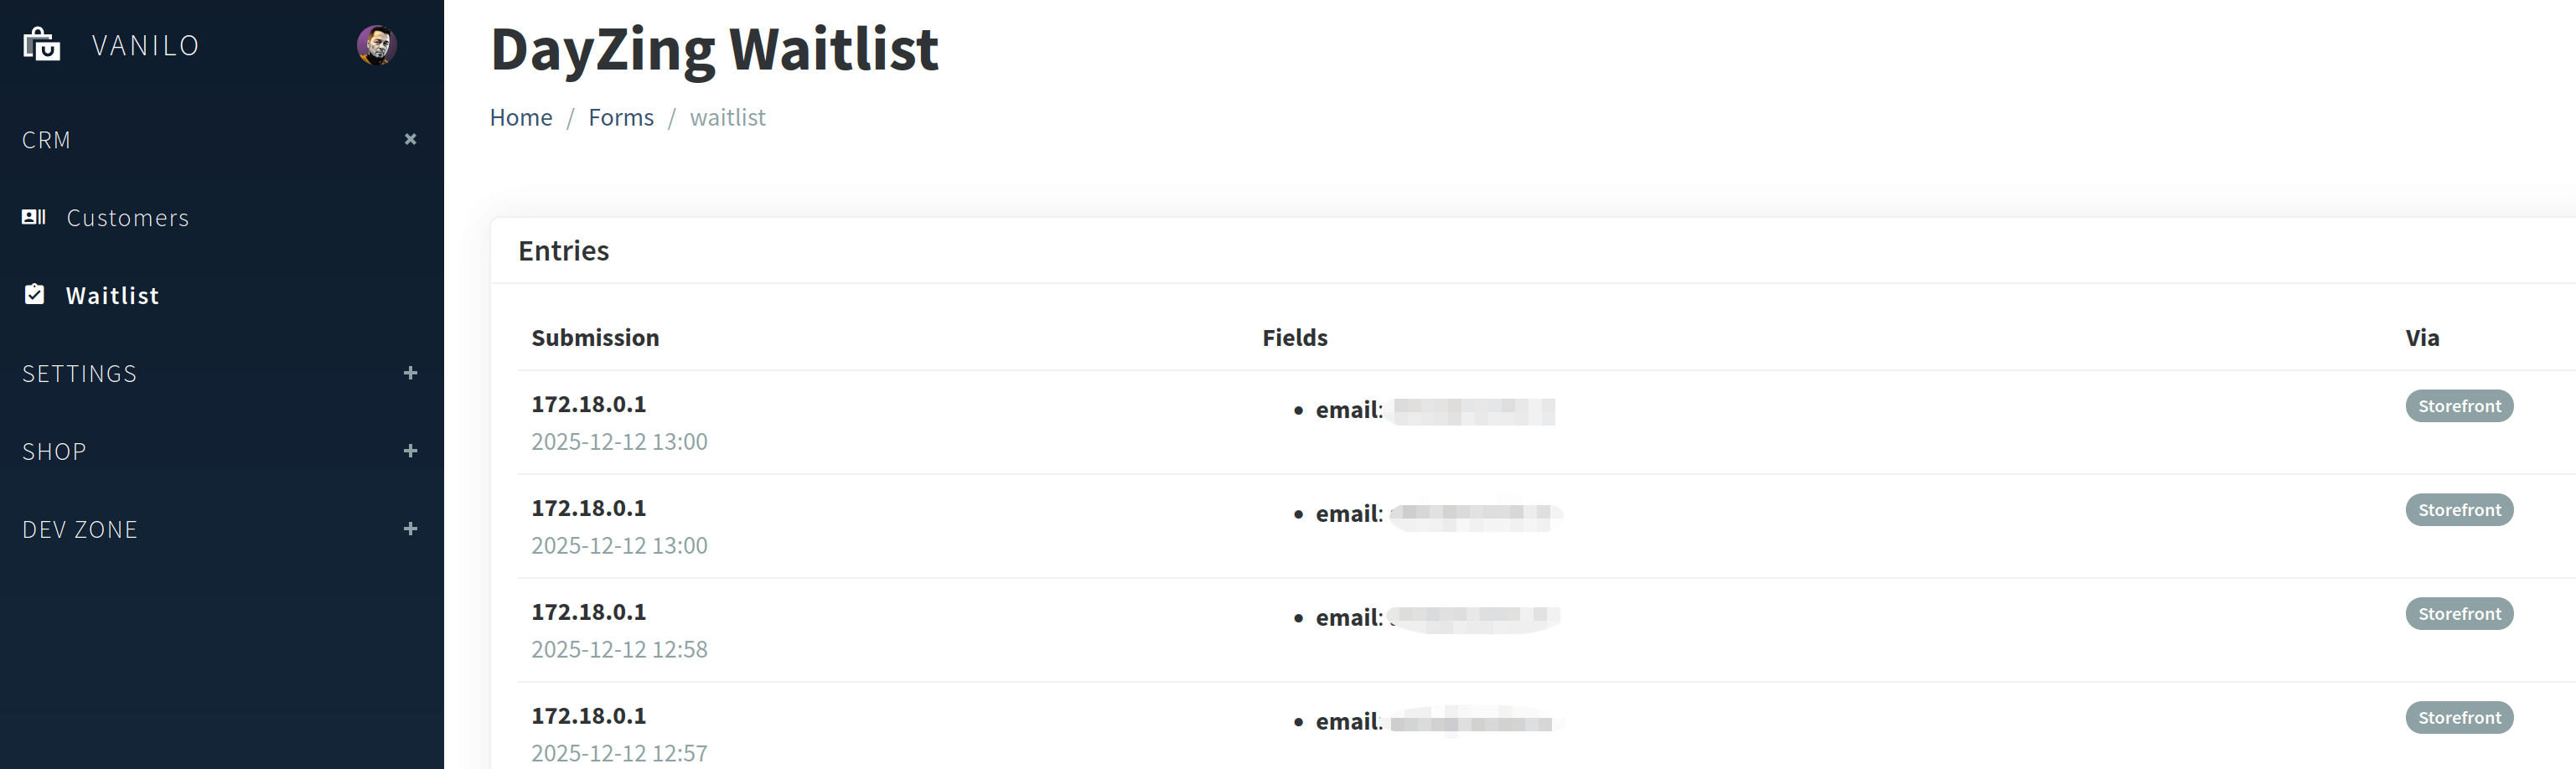
The form submissions are visible in the Admin:
Form Notifications
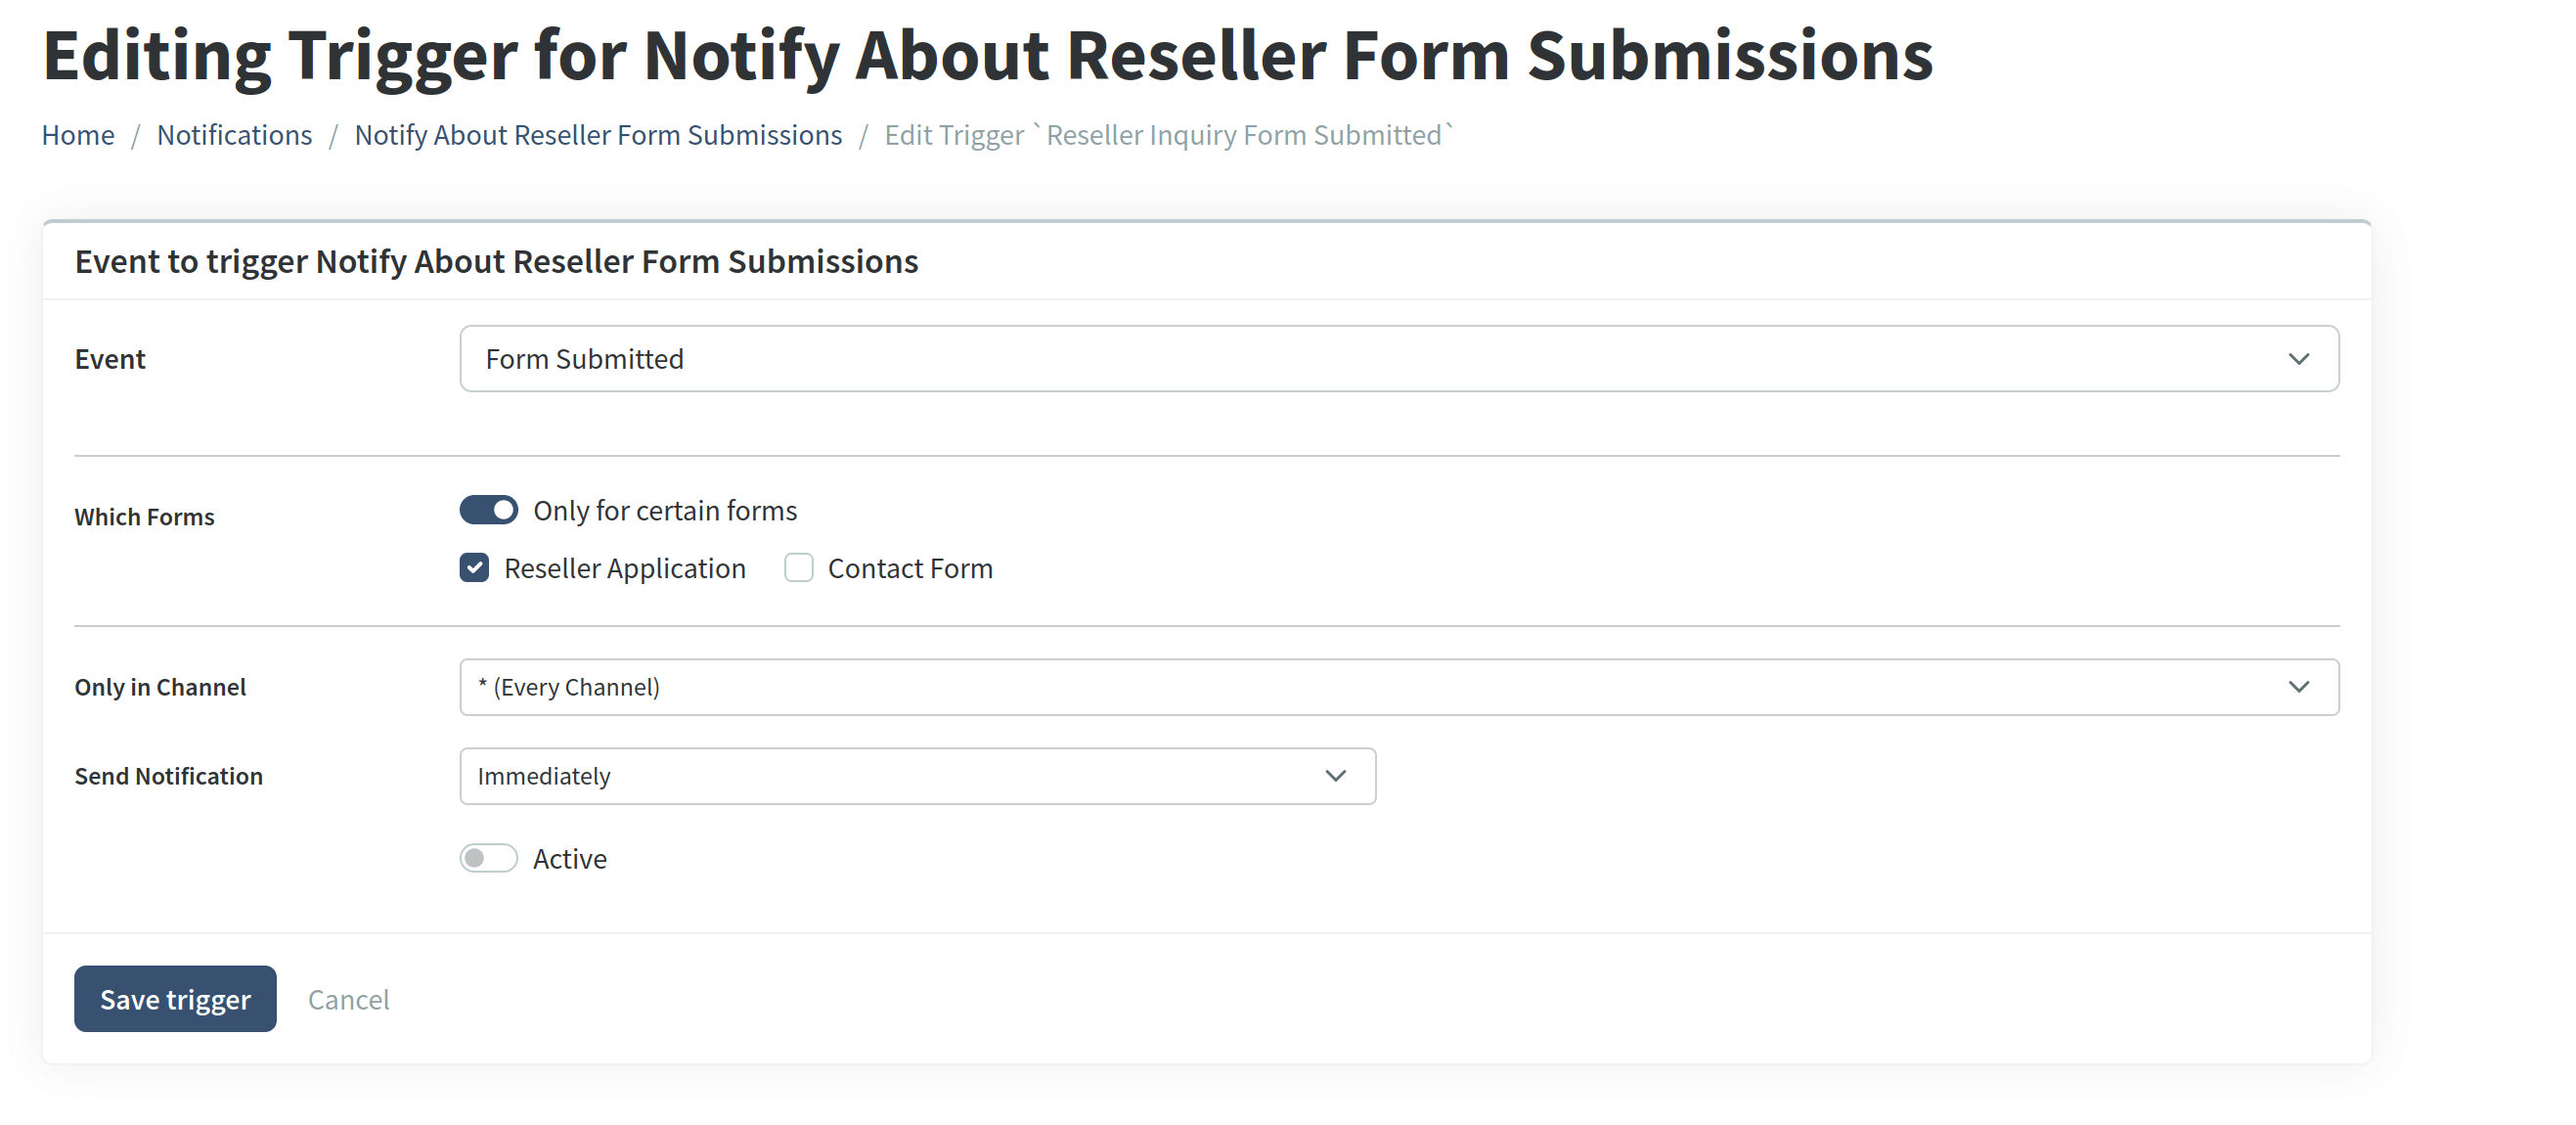
Using the Notification Module, form submission events can be used for triggering emails, sms or webhooks.
It is also possible to use different notifications for each form: